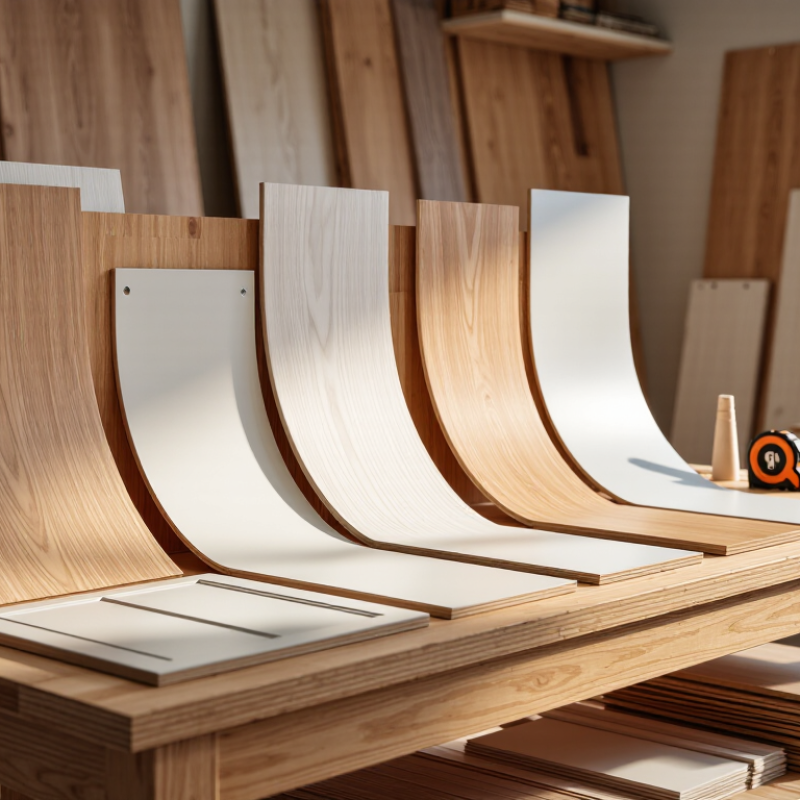
How to Choose White Birch Veneer for Your Project

Choosing White Birch Veneer is not just a color decision. It is a choice about grain, construction, durability, and the way light moves across a finished surface. A pale sample may look calm beneath showroom lights, then appear warmer beside a window or darker under a clear finish. Small differences matter. So does the substrate beneath the veneer.

In this guide, fictional veneer specialist Mara Ellison offers a practical reminder: “Choose for the finished room, not the sample alone.” Treat that as an editorial guiding line, not a sourced industry quotation. Compare several sheets in natural and indoor light. Check the grain direction, face consistency, thickness, and intended backing. Ask whether the panel will be used for cabinet doors, wall panels, shelving, or another application. Each use brings different demands. A smooth face can suit a clean, modern cabinet, while visible grain variation may add character to a larger wall.

The details are easy to overlook. They should not be. Match the veneer to the project’s finish, edge treatment, and expected wear, and confirm product specifications with the supplier. A sample can still mislead. White birch varies, and no single grade or cut suits every design. Careful comparison helps you make a better-informed choice—and leaves room to reconsider when the real material looks different from the first impression.

How to Choose White Birch Veneer for Your Project

Understand the Characteristics of White Birch Veneer

White Birch Veneer is a thin wood face, not a single guaranteed visual grade. Suppliers may use paper birch or yellow birch, with color ranging from pale cream to light reddish tan. The USDA Forest Products Laboratory’s Wood Handbook lists specific gravity near 0.55 for paper birch and 0.62 for yellow birch at 12% moisture content. These figures describe solid wood, not veneer-sheet strength. Still, they help explain why species and backing matter.

Look closely.

Expect fine, mostly straight grain, with occasional small knots, mineral streaks, or subtle curl. Book-matched leaves can mirror those marks across a cabinet door. Veneer is thin, so its substrate and adhesive matter: an uneven panel can show ripples or open joints. The same USDA handbook explains that wood changes dimension as its moisture content shifts. Acclimate panels indoors before assembly, and seal edges consistently. Ask about species, leaf matching, backing, and face grade; inspect a sample under your project’s lighting. Pale faces may amber or reveal glue lines under clear finishes.

Define Your Project’s Appearance and Performance Needs

White birch veneer can look pale and calm, but its grain still varies from sheet to sheet. Decide whether your project needs a quiet, even surface or visible natural variation. For cabinet fronts, ask for a consistent grade and matching approach. For a feature wall, broader color changes may add warmth. View a finished sample beside your floor and hardware; raw veneer often looks different after coating. Check it in daylight and under the room’s evening lights.

Appearance is only half the decision. A kitchen door, desk top, and wall panel face different wear, moisture, and cleaning demands. Confirm that the veneer can be bonded to a suitable, stable core, and ask how the edges will be protected. Match the finish to expected use: a frequently handled surface may need more resistance to marks than a decorative panel. I have seen plans focus on grain and overlook edge details. That small oversight can show quickly. Also consider the room’s humidity and follow the fabricator’s installation guidance.

Tips: Request a sample with the intended finish, then inspect it from several angles. Note the veneer thickness, core material, and edge treatment in your specifications. If the sample looks slightly uneven, pause before rejecting it; the installed layout may balance those differences—or make them more obvious.

Compare Veneer Grades, Cuts, and Matching Options

White birch veneer ranges from pale cream to light tan, with subtle grain and occasional small knots. Grade names differ between suppliers, so ask what each grade allows before comparing prices. A higher face grade usually offers a cleaner, more consistent appearance, while lower grades may show more color variation or natural marks. Small differences matter. Inspect actual sheets when the finished surface needs to look uniform.

The cut changes the pattern. Plain-sliced veneer often has broad, cathedral-like grain, while quarter-sliced veneer tends to show straighter lines and occasional flecks. Rotary-cut veneer can create wider, more varied patterns. Matching affects how sheets look together: book matching mirrors adjacent leaves, and slip matching repeats them in the same direction. Neither is automatically better. Choose based on the visual rhythm you want across doors, panels, or cabinet fronts.

Tips: Request several consecutive sheets, not one sample. View them side by side in the project’s lighting, then test your planned finish on a small offcut. Finish can deepen the color, and a sample may still differ from the full batch. Check veneer thickness, backing, and sheet dimensions before ordering.

Check Thickness, Backing, and Compatibility Requirements

White birch veneer can appear consistent in a sample, yet thickness and backing affect how it behaves during installation. Check the stated thickness before ordering, especially if the surface will be sanded. A thin face has little room for correction. The substrate supplies most of the panel’s strength, so choose a flat, stable base rather than expecting the veneer to hide defects. Even a small ridge may show through a pale birch surface.

Backing changes handling and adhesive choices. Paper-backed veneer can be easier to position, while unbacked sheets may suit certain flat-panel applications. Options vary, so confirm the backing material and recommended adhesive with the supplier. Match the veneer to the substrate and intended use, including curved surfaces, moisture exposure, and edge finishing. A test panel is worthwhile. It can reveal bubbles, uneven color, or poor adhesion before the full sheet is cut.

Tips: Check thickness, backing, and adhesive compatibility on the same sample. Follow the adhesive maker’s directions for open time and pressure. Keep scraps for color checks; birch can look different under warm workshop lights. I still find lighting easy to underestimate. Judge the finished sample where the project will be used.

Evaluate Suppliers and Plan for Finishing and Installation

White birch veneer looks subtle, so small differences in grain and color can stand out across a large panel. When comparing suppliers, request a sample from the current production lot, not just a catalog photo. Check sheet thickness, backing type, grain direction, and how much usable face material each sheet provides. Ask how the veneer is stored and packed; dry, flat sheets are easier to handle. A clear answer matters. Confirm lead times and replacement procedures in writing, especially if several sheets must match. One easy-to-miss detail: a small sample may not show the variation across a full bundle.

Plan the finish before installation. Birch can absorb stain unevenly, so test your chosen finish on an offcut or sample from the order. Sand lightly and consistently; sanding through the thin face layer is difficult to repair. Test it first. Use an adhesive and pressing method suited to the panel core, and follow the adhesive maker’s instructions for spread, pressure, and cure time. Keep veneer and substrate in the same room beforehand, away from damp walls or direct heat. Allow extra material for trimming and mistakes. That allowance may feel wasteful, but running short halfway through a cabinet door is worse.

Tips: Label sheets as you unpack them, keep their grain direction consistent, and dry-fit each piece before gluing. Use a sharp blade and a clean, flat work surface. If edges lift or bubbles appear, pause and check the bond rather than hiding the defect with finish.

How to Choose White Birch Veneer for Your Project - Evaluate Suppliers and Plan for Finishing and Installation
Project Stage Evaluation Dimension What to Check Practical Guidance Planning Action
Define Requirements Appearance and grade Review sample sheets for color, grain, knots, mineral streaks, patches, and allowable natural variation. Birch veneer can vary in color and figure. Grade names and defect limits may differ between suppliers, so do not compare grade labels alone. Approve a representative sample and document acceptable color and defect variation before ordering.
Define Requirements Cut and grain direction Confirm whether the veneer is rotary-cut, plain-sliced, or another cut, and check the direction of the grain. Cut affects the visible grain pattern. For adjacent panels or doors, specify the desired grain orientation and matching method. Request a layout or sequence plan when visual continuity across multiple panels matters.
Evaluate Suppliers Product specification Ask for veneer thickness, sheet dimensions, backing type if any, grade description, and permitted tolerances. Thickness and format vary by product. Confirm the actual specification rather than relying on a general “standard veneer” description. Check that the material suits the substrate, adhesive, pressing method, and finished-panel requirements.
Evaluate Suppliers Consistency and quality control Ask how sheets are inspected and sorted for color, grain, defects, and usable area. Natural veneer is not perfectly uniform. A clear grading and sorting process helps reduce mismatches between sheets and panels. For large orders, request production-representative samples and confirm whether sheets will be selected from one consistent lot.
Evaluate Suppliers Documentation and traceability Request available product data, origin or chain-of-custody documentation, and relevant emissions or compliance information. Requirements depend on the project location and end use. Verify documentation against the applicable regulations and specification. Include required certificates, test reports, and delivery records in the purchasing checklist.
Evaluate Suppliers Packaging and delivery condition Confirm how sheets are protected from moisture, edge damage, and bending during storage and transport. Veneer can be damaged by rough handling or unsuitable moisture conditions. Inspect deliveries promptly and keep sheets flat and protected. Agree on packaging, delivery timing, inspection procedures, and how damaged sheets will be handled.
Plan Finishing Surface preparation Check the veneer surface for glue residue, dents, raised grain, and sanding marks before applying a finish. Thin veneer is easy to sand through. Use light, even sanding and avoid aggressive sanding or excessive pressure. Make a sample panel using the planned preparation and finish before treating the full project.
Plan Finishing Color and stain behavior Test the intended stain, dye, clear coat, or other finish on the actual veneer and substrate combination. Birch may absorb color unevenly, and finishes can change its appearance. Water-based products may raise the grain; follow product instructions and test first. Approve a finished sample under the project’s expected lighting before selecting the final finish schedule.
Plan Finishing Finish compatibility Check compatibility between the adhesive, veneer, stain, sealer, and topcoat. Some coatings can affect adhesion or color development. Follow the coating and adhesive manufacturers’ recommendations for application and curing. Test the complete finishing system, including drying times and any required sealer, on a representative panel.
Plan Installation Substrate condition Verify that the substrate is clean, dry, flat, stable, and suitable for the chosen adhesive. Dust, oil, unevenness, or excess moisture can contribute to poor bonding or surface defects. Prepare and inspect the substrate before cutting or bonding the veneer.
Plan Installation Adhesive and pressing method Select an adhesive and application method approved for the veneer, substrate, and service conditions. Open time, spread rate, pressure, and cure time depend on the adhesive and equipment. Follow the product instructions rather than using a universal setting. Run a small bond test and confirm the press or clamping procedure before production.
Plan Installation Balancing and panel stability Consider applying a balancing layer or matching veneer to the opposite face of a panel. Unbalanced panel construction can increase the risk of warping or bowing as moisture conditions change. Specify balanced construction for panels where flatness and dimensional stability are important.
Plan Installation Acclimation and storage Store the veneer flat in a clean, dry environment and allow it to adjust to site conditions as directed by the supplier. Rapid changes in temperature or relative humidity can affect wood products. Avoid storing sheets against damp floors, walls, or direct heat sources. Coordinate delivery with installation and finishing schedules, and follow the supplier’s storage and acclimation guidance.
Final Checks Inspection and safety Inspect bonded panels for bubbles, loose edges, surface defects, and finish consistency. Use appropriate dust and coating controls. Follow safety data sheets and workplace requirements for adhesives, sanding dust, stains, and coatings; provide suitable ventilation and protective equipment. Record inspection results, retain approved samples, and address defects before final installation.